Creating & Organizing Projects for Collaboration
Effective project organization is the backbone of smooth teamwork inside Rankar.ai Task Management. While individual tasks keep the day-to-day operations...
Effective project organization is the backbone of smooth teamwork inside Rankar.ai Task Management. While individual tasks keep the day-to-day operations running, Projects help you group related tasks, collaborate efficiently, and track progress toward larger goals. Whether you’re managing a content calendar, a marketing campaign, or a technical sprint, learning to set up and organize projects the right way ensures everyone on your team is aligned and working with clarity.
This article will walk you through how to create projects, structure them strategically, and use built-in tools for collaboration so even new users can manage team workflows like professionals.
Navigating to the Projects Section
From the Task Manager navigation, select the Projects tab.
This section is dedicated to:
Creating and managing project workspaces
Grouping related tasks under a single project
Filtering, sorting, and prioritizing work by project
Using chat for team collaboration and real-time coordination
On this page, you’ll find:
A Search Bar to find specific projects by name, client, or team member.
Filter options to sort by Status, Priority, and Teams.
Overdue and Due This Week badges that highlight time-sensitive projects.
A New Project button to create new initiatives.
A Chat button for direct collaboration inside a project workspace.
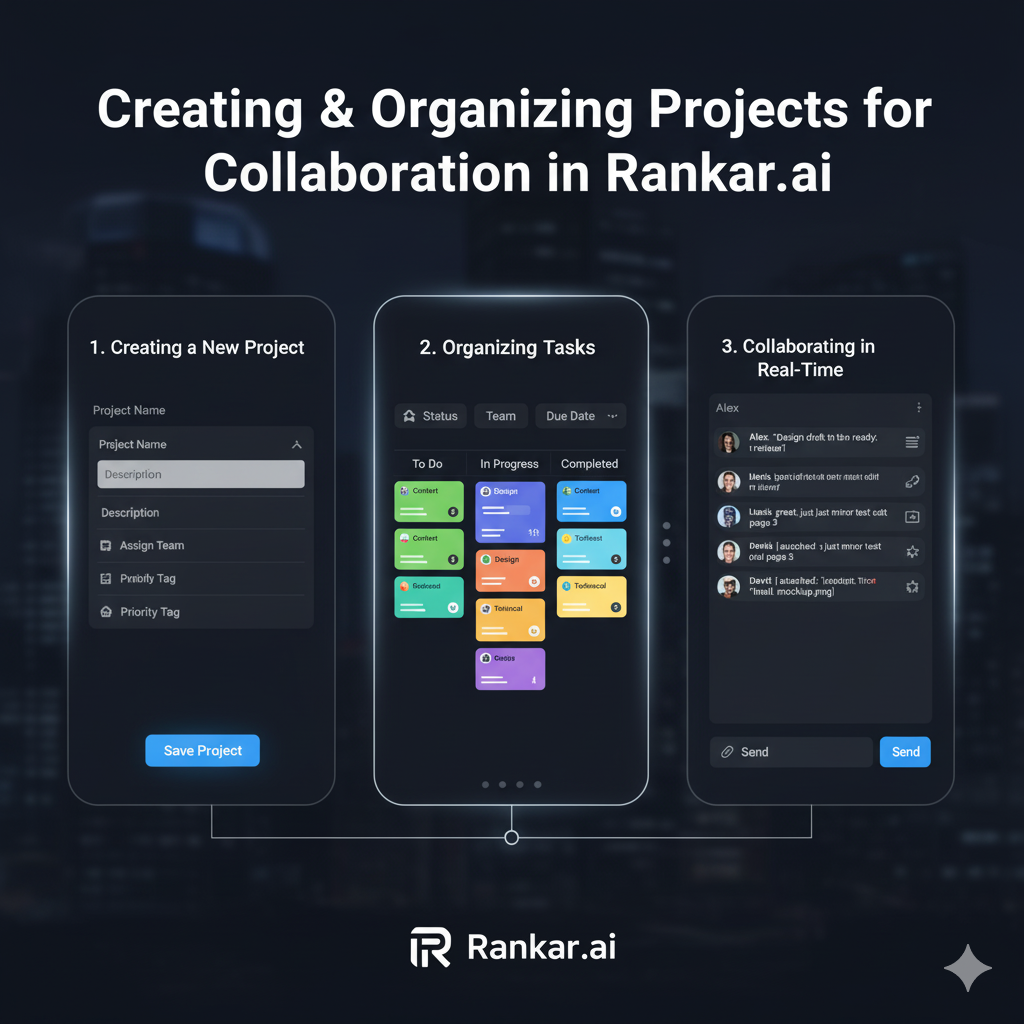
Creating a New Project
Click New Project to open the project creation panel. A good project setup ensures smooth collaboration and easy tracking.
When creating a new project:
Give it a clear, descriptive name.
Example: “Q3 Content Marketing Campaign” is better than “Campaign 3.”Add a meaningful description.
This should outline the project’s goals, timeline, major deliverables, and any relevant links or background information. This gives everyone joining the project a shared understanding of the purpose.Assign relevant teams or departments.
This ensures that only the right people have visibility and responsibility within the project.Set priorities or tags.
This helps categorize and filter projects later when you have multiple running at once.
Once you fill out the required information, save the project to create a dedicated workspace for related tasks.
Organizing Tasks Under a Project
After creating the project, you can begin adding tasks directly under it using the New Task button. Associating tasks with projects allows you to:
Track progress at both the task and project levels
Keep related work organized in one place
Generate more meaningful reports and dashboards
Prevent scattered or duplicated efforts
For example, if you’re running a website redesign project, you might create tasks for wireframing, content updates, QA testing, and final deployment — all under one project umbrella.
Using Project Filters to Monitor Work
The Projects section includes powerful filters to help you focus on what matters most:
Status Filter: See which projects are active, completed, or on hold.
Priority Filter: Focus on high-priority initiatives first.
Team Filter: Narrow down projects by specific teams or departments.
In addition, the Overdue and Due This Week labels highlight projects that may require immediate attention. These are particularly helpful for project managers and team leads who are overseeing multiple projects simultaneously.
Collaborating in Real Time with Project Chat
Each project comes with an integrated Chat feature, accessible through the Chat button in the Projects tab. This allows teams to:
Discuss project updates in context
Share files, links, or feedback
Resolve blockers quickly without switching tools
Keep a centralized record of project conversations
Using chat inside a project keeps communication focused and eliminates the confusion that often comes from scattered emails or external messaging apps.
Best Practices for Project Organization
For new users, here are a few professional practices to build from day one:
Always give projects descriptive names and clear goals to avoid confusion.
Group related tasks under the right project instead of creating isolated tasks.
Use filters regularly to stay on top of deadlines and priorities.
Leverage the chat feature for project-specific discussions.
Review project health weekly using filters and overdue/due-this-week badges.
Key Takeaways
The Projects tab is where strategic collaboration happens.
Creating clear, structured projects helps teams stay aligned.
Grouping tasks under projects improves organization, tracking, and reporting.
Filters and chat make monitoring and collaboration straightforward.
Following consistent naming and structuring practices ensures smooth scaling as the number of projects grows.